
I’ve started using Keycloak for most of the internal authentication on my home network recently via OIDC, and I’ve started to extend that outwards to other services so I have a single-sign-on experience.
One of the services I’ve started using this with is Amazon Web Services, which provides SAML authentication into IAM roles.
It’s not the most straight-forward of things to set up with Keycloak as the identity provider – there’s a few defaults in Keycloak which will stand in your way. I’ve tried my best to document this below, in case it helps anyone else out.
One major benefit of using SAML is that you can manage your users outside of AWS in whatever identity provider you already have. You can assign roles to groups, and thus manage what AWS accounts at which permissions level users have access to my telling Keycloak the AWS roles, and then Keycloak passes the information onto AWS about which roles are authorised. AWS then prompts the user to choose the role in which they wish to log in to (if there’s more than one)
Just show me how to do it!
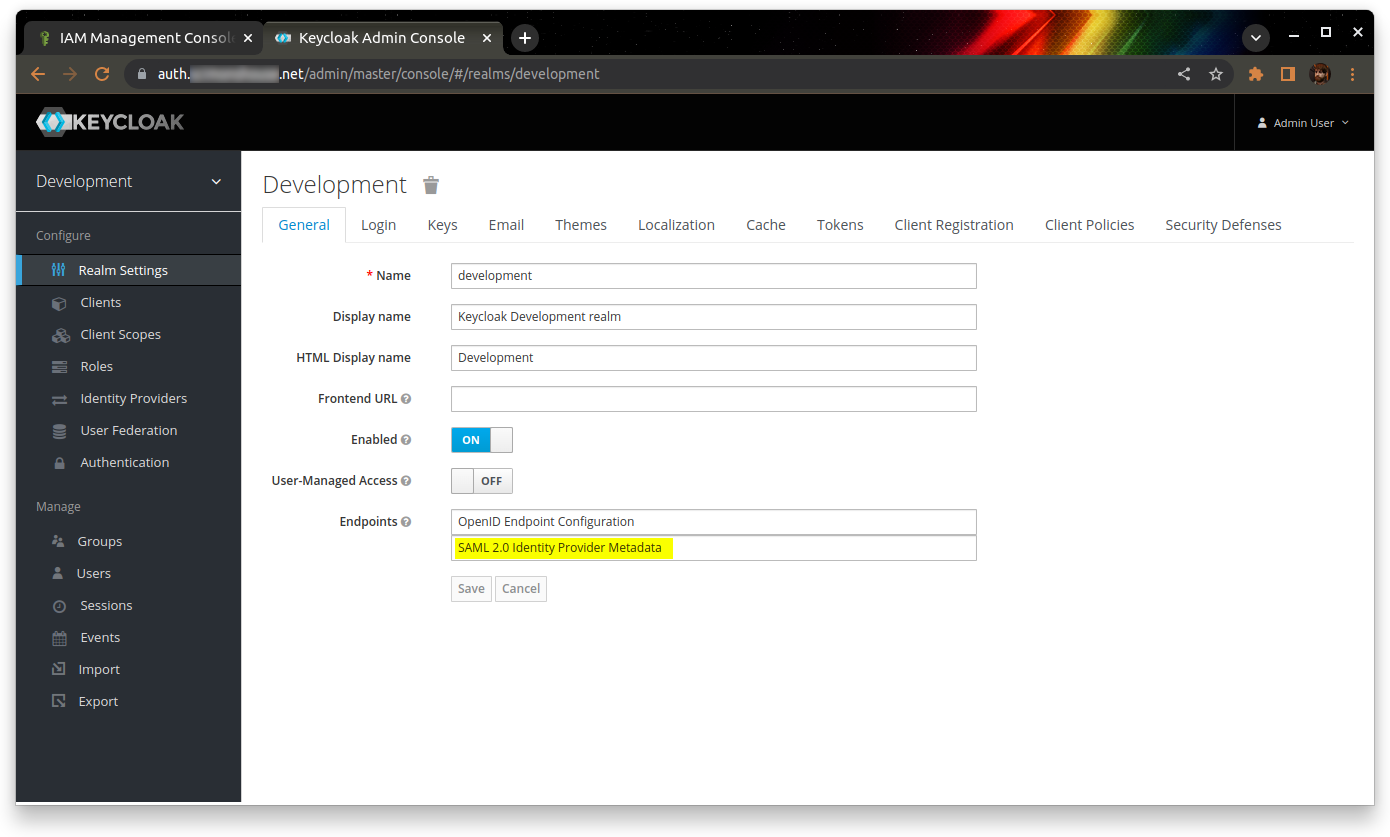
Log into your Keycloak admin console, and download the SAML IdP metadata XML document. I’m going to save this file as “idp-metadata.xml”.
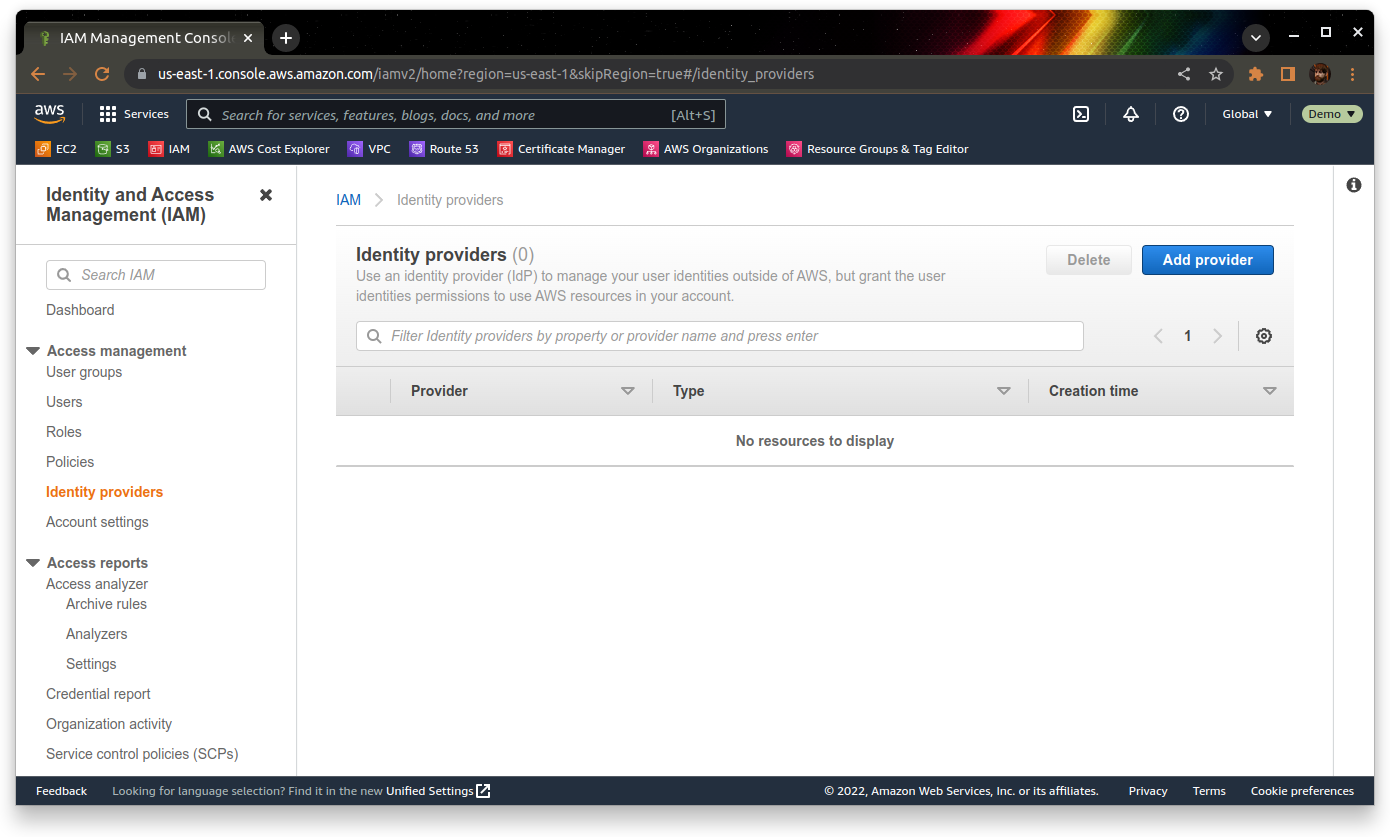
Go to IAM’s Identity providers section, and add a provider:
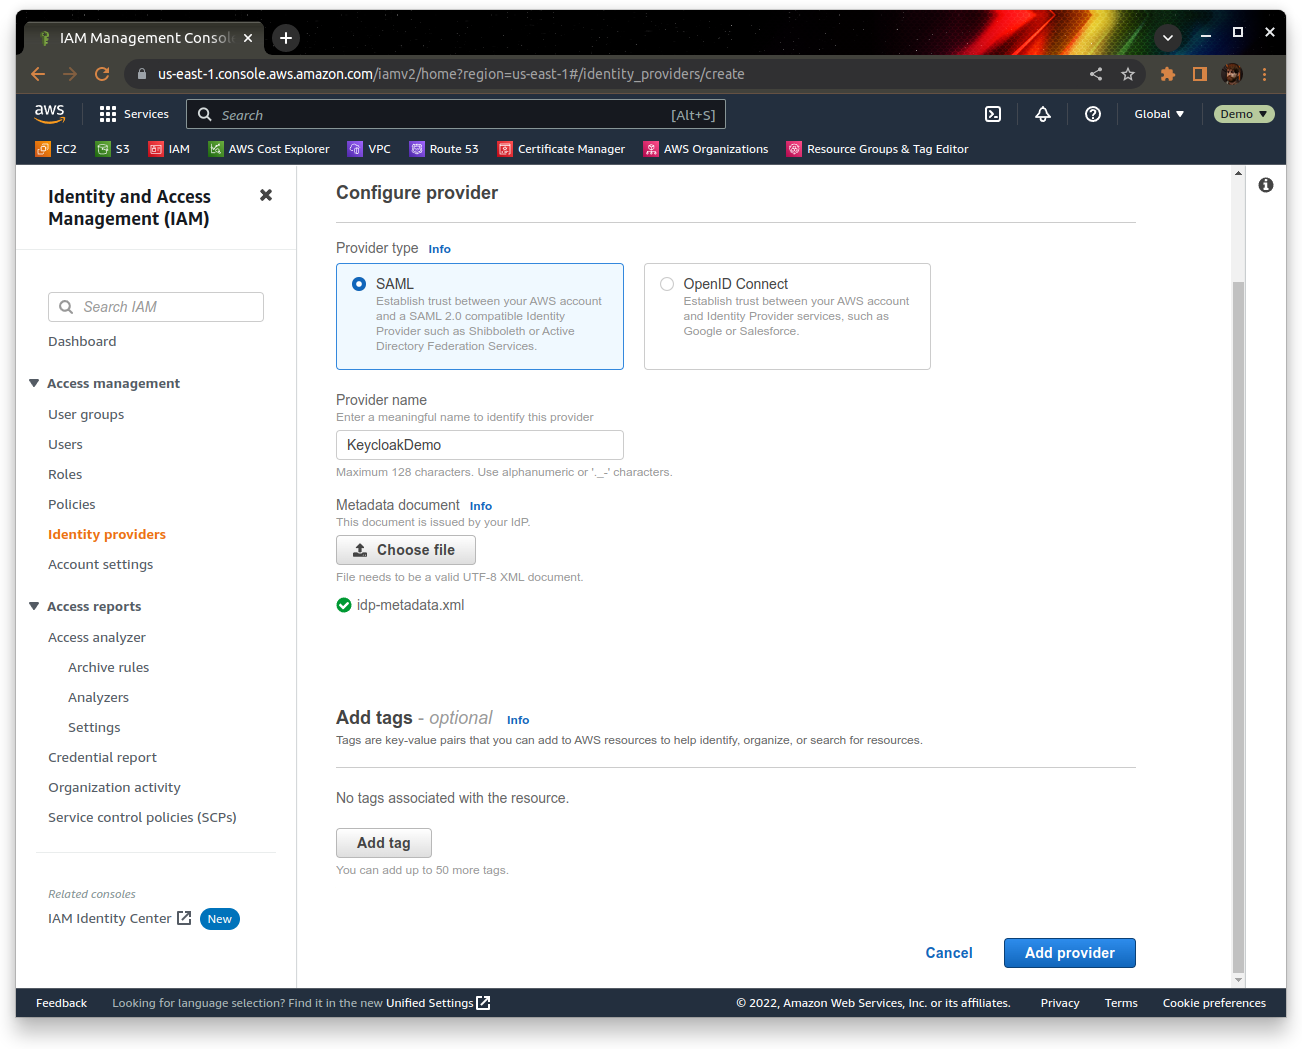
 Give the profile a name (I’m going to use “KeycloakDemo”), and upload your idp-metadata.xml file from earlier. Click “Add provider” to create the identity provider
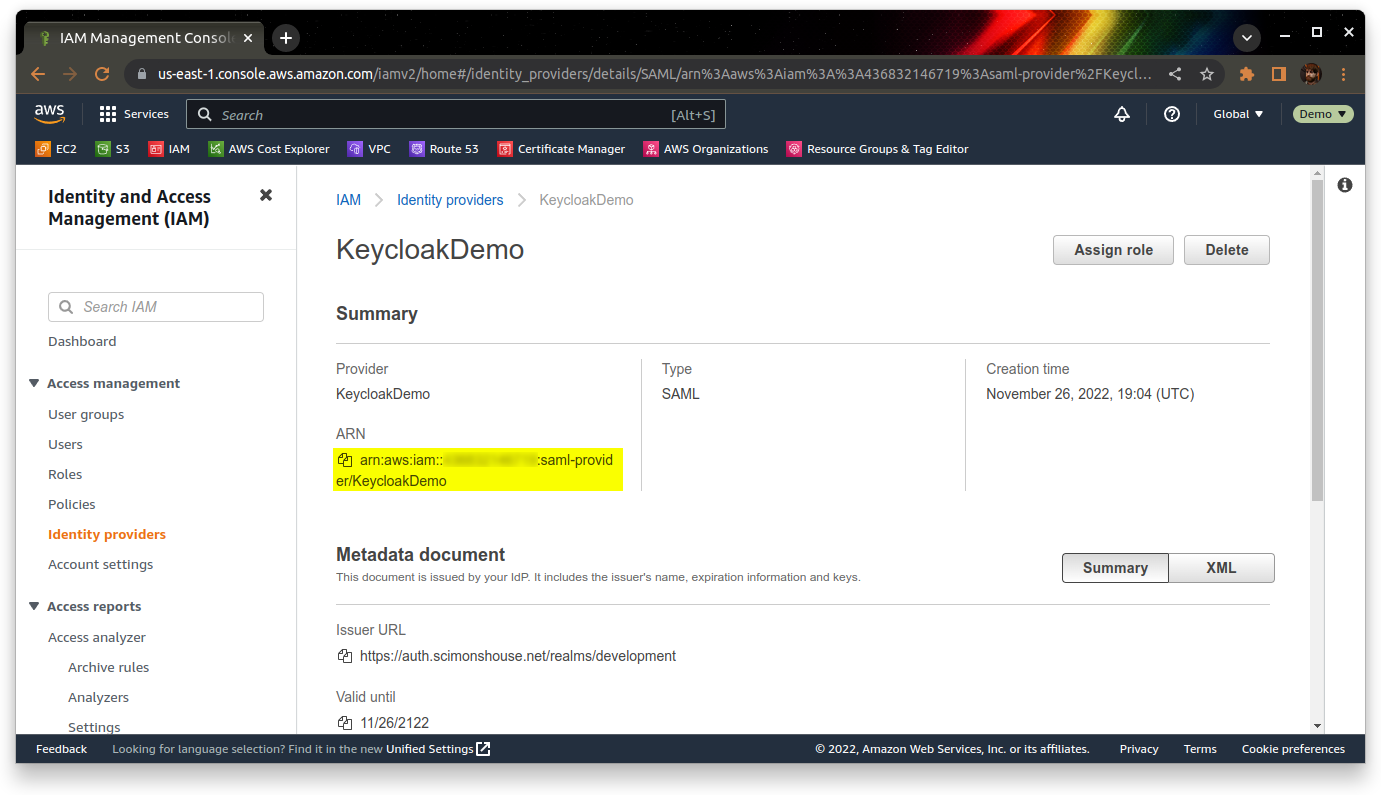
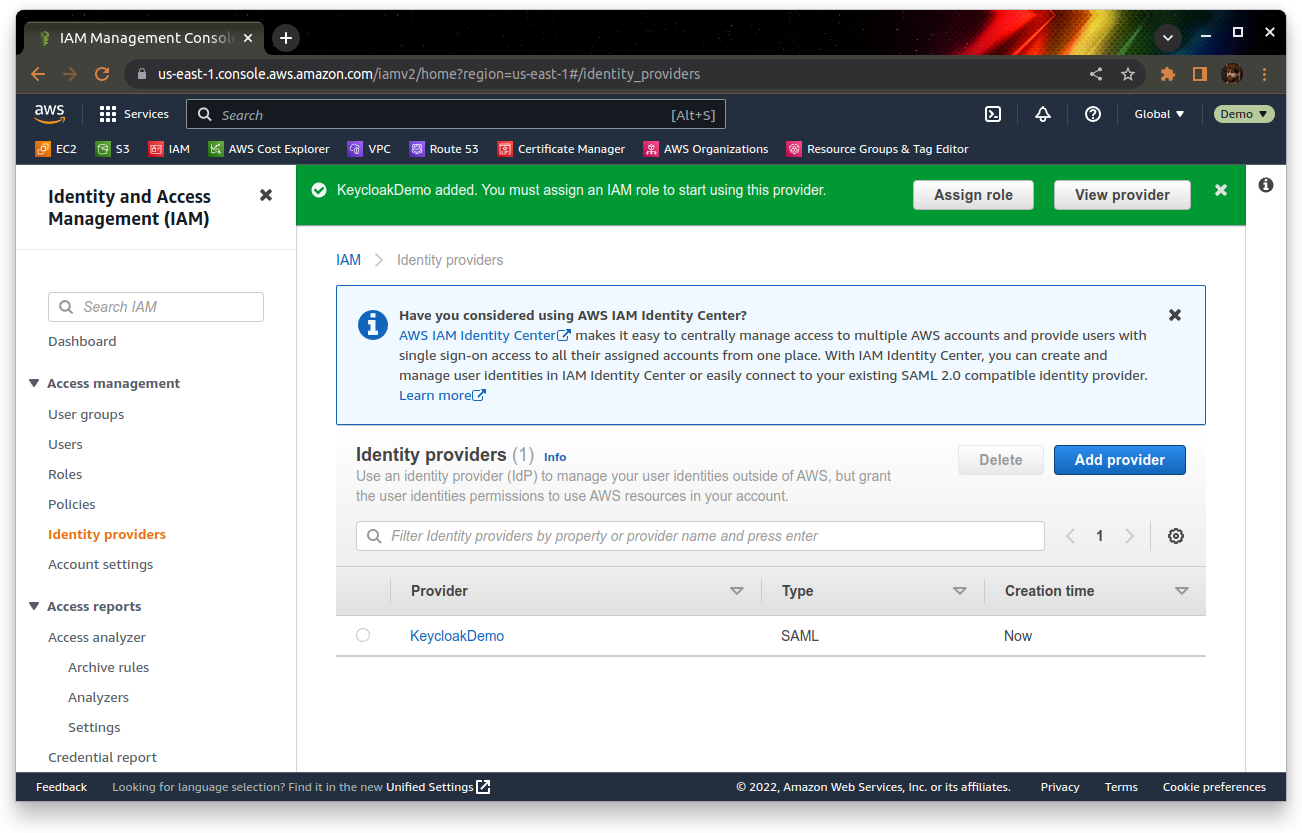 Once it’s created, go into the provider and make a note of the ARN under the summary section:
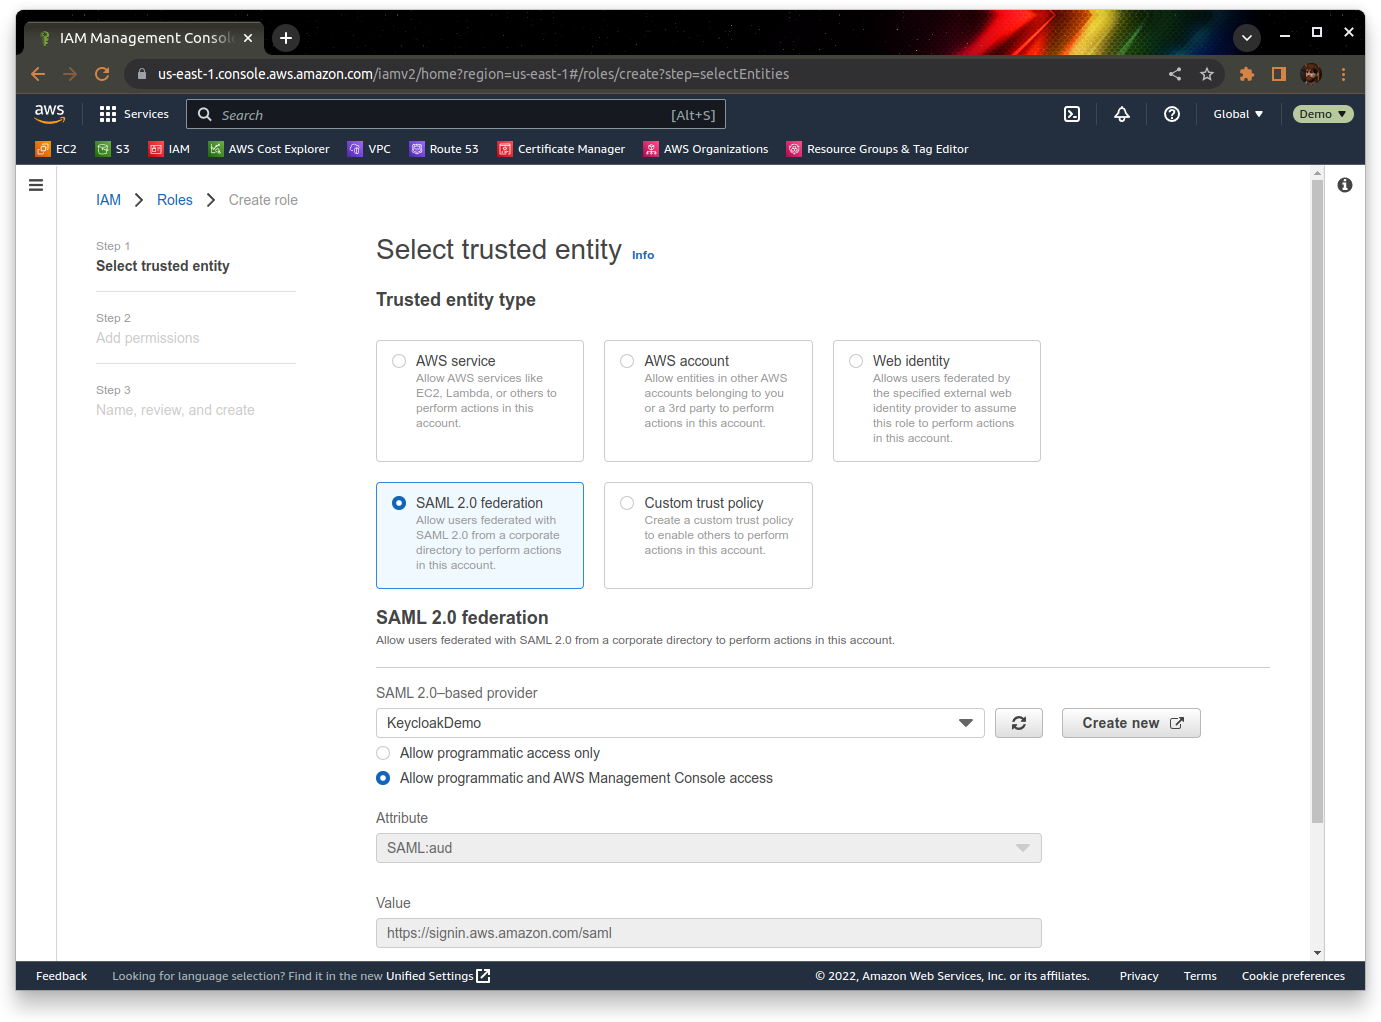
Now we need to configure a role to use once we’ve logged in via Keycloak. You can do this from the “Roles” section of the IAM console.
Choose “SAML 2.0 federation” as the trusted identity type, and then choose your identity provider from the dropdown. We’re setting this up for console access, so choose the relevant option for that too.
 Set up the permissions that the role will have – for this demo we’re just going to assign the built-in AdministratorAccess policy.
Finally, give the role a meaningful name – I’m going to pick “DemoRole” for this.
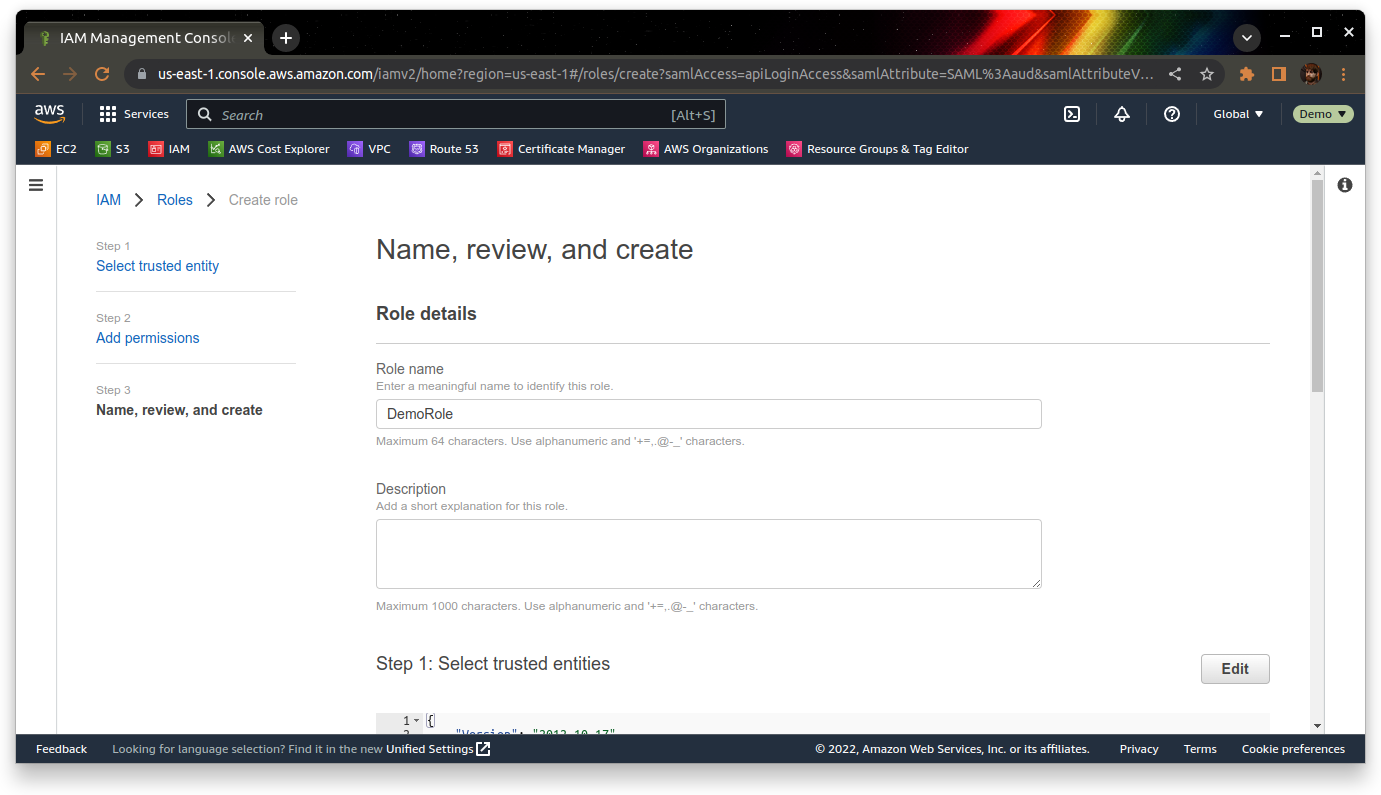
Once you’ve picked a name, review the settings and click “Create role”.
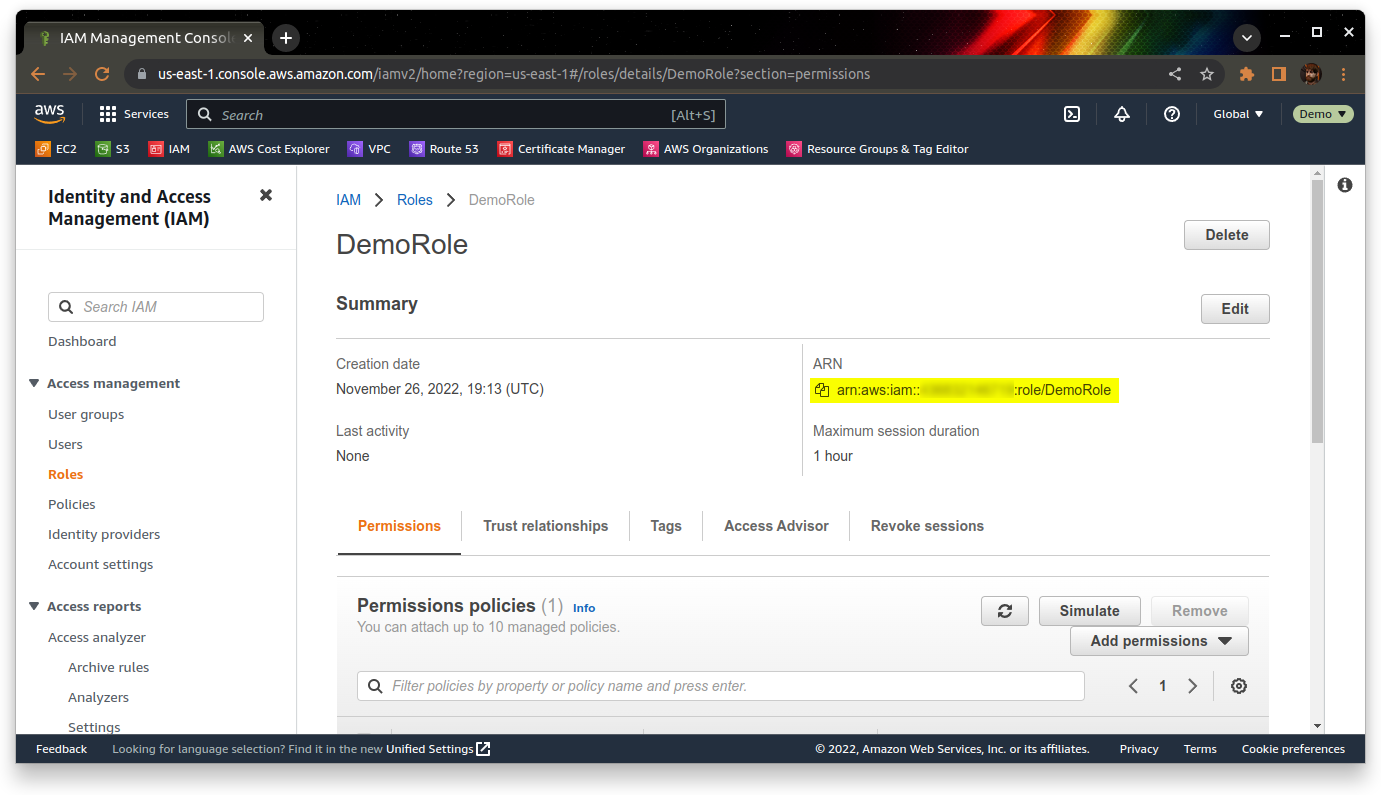
Now that we have the role, we should make a note of the role ARN – you can find it by going into the role, and looking under the Summary section:
 We have now configured AWS to trust Keycloak as an identity provider, and configured a role for users to use when they log in via the identity provider. We now need to set up Keycloak to authenticate users to AWS.
AWS provides it’s own SAML metadata – we will download this first from https://signin.aws.amazon.com/static/saml-metadata.xml
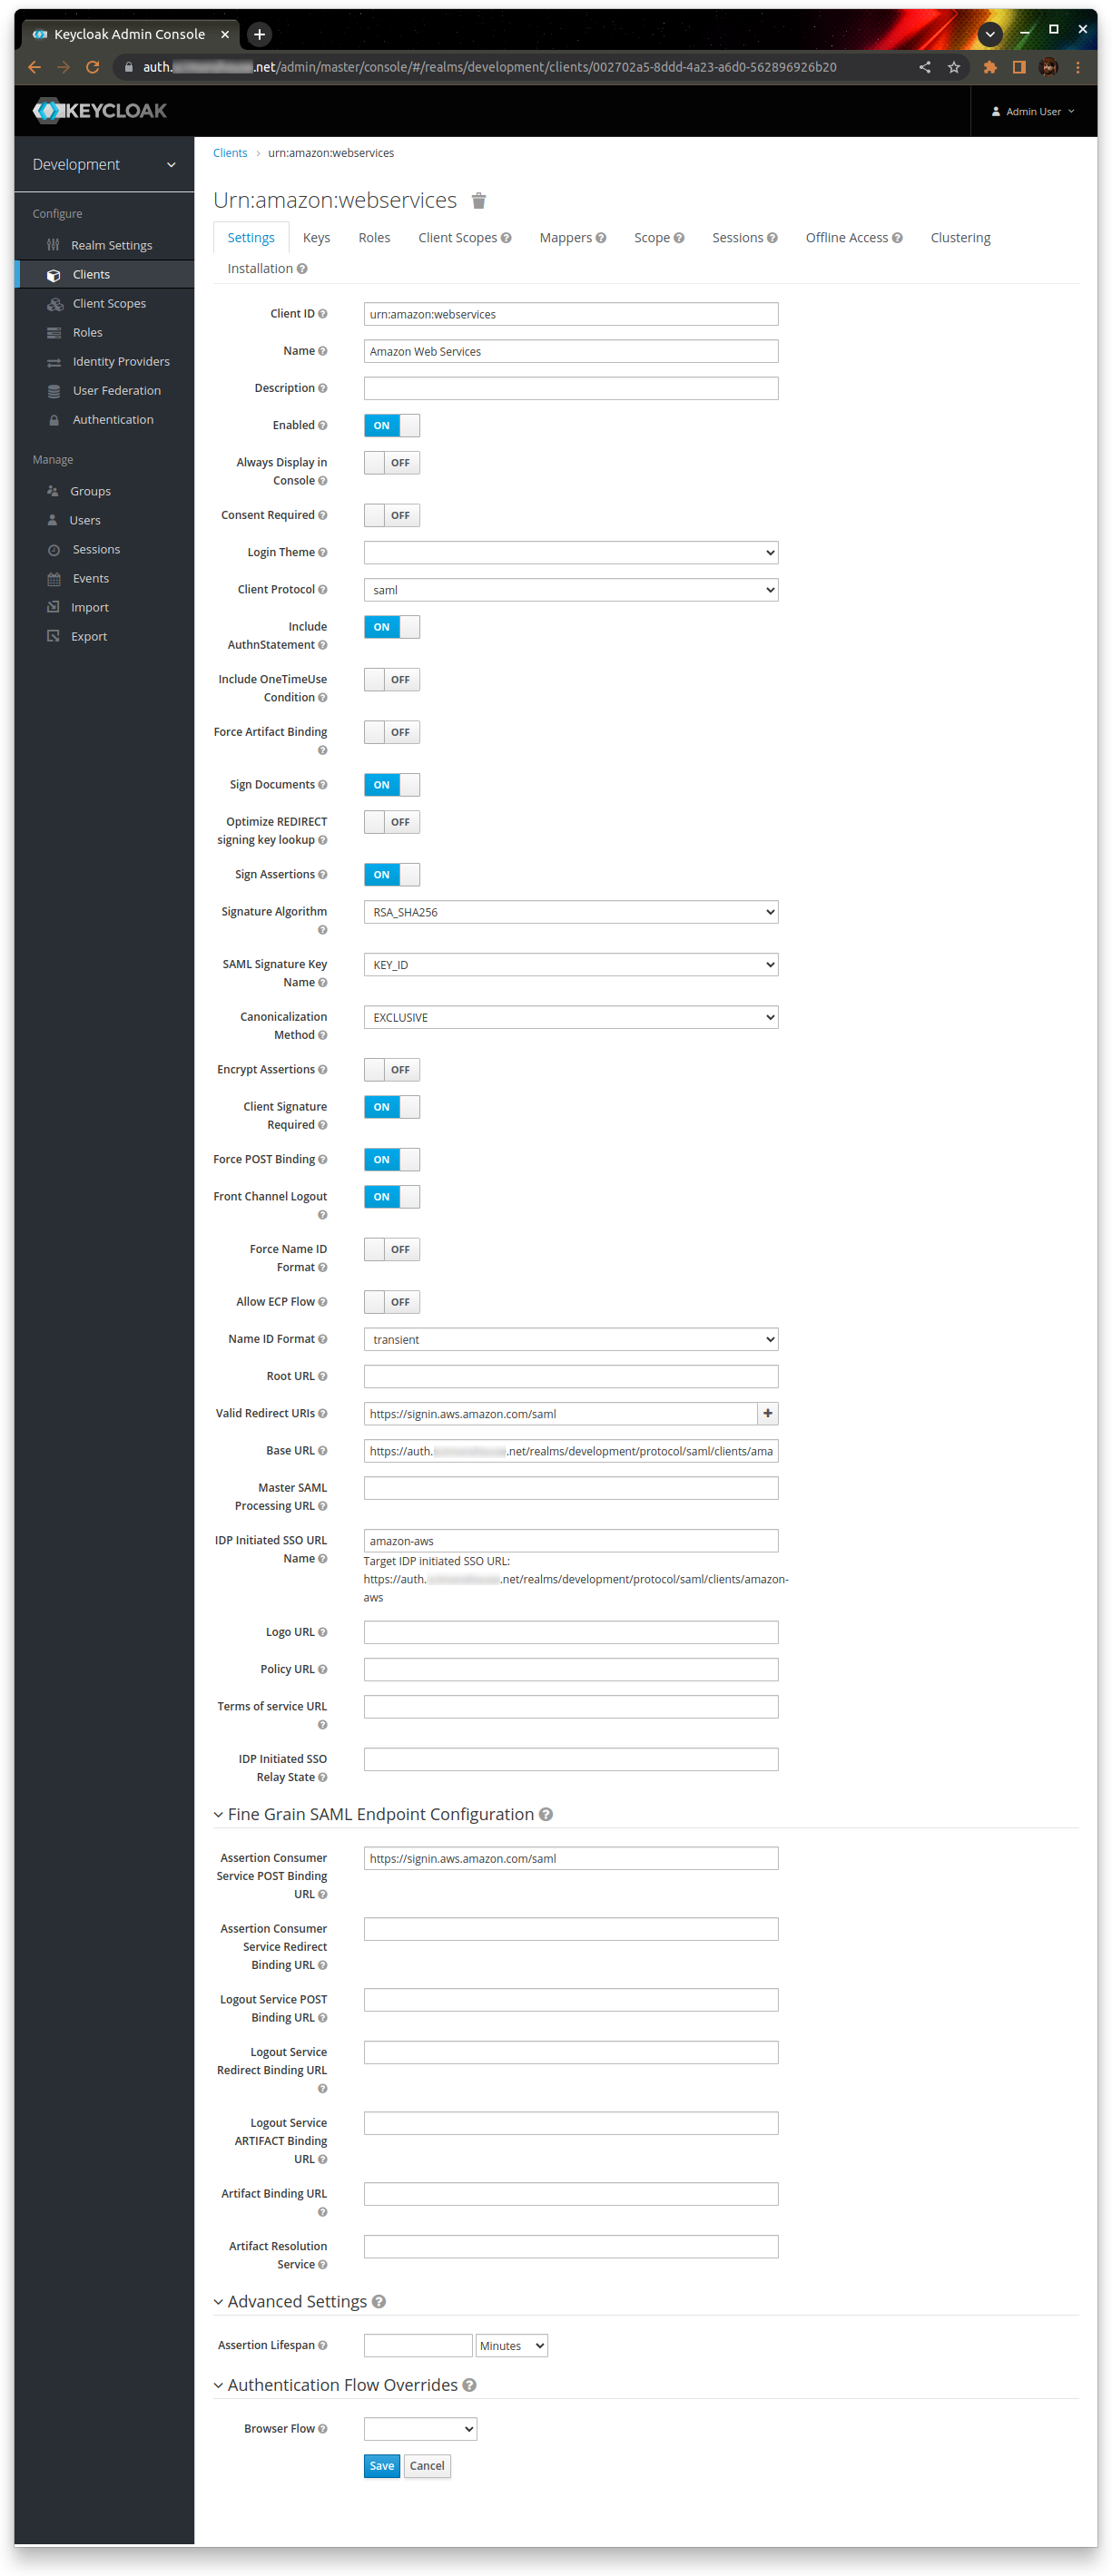
Go back to Keycloak, and create a new client. Import the client from the saml-metadata.xml file you just downloaded. The Client ID should be “urn:amazon:webservices”, and the Client Protocol should be “saml”

Save the client, then populate the following settings:
| Name | Amazon Web Services |
| Base URL | https://<keycloak>/realms/<realm>/protocol/saml/clients/amazon-aws |
| IDP Initiated SSO URL Name | amazon-aws |
Leave everything else as the default.
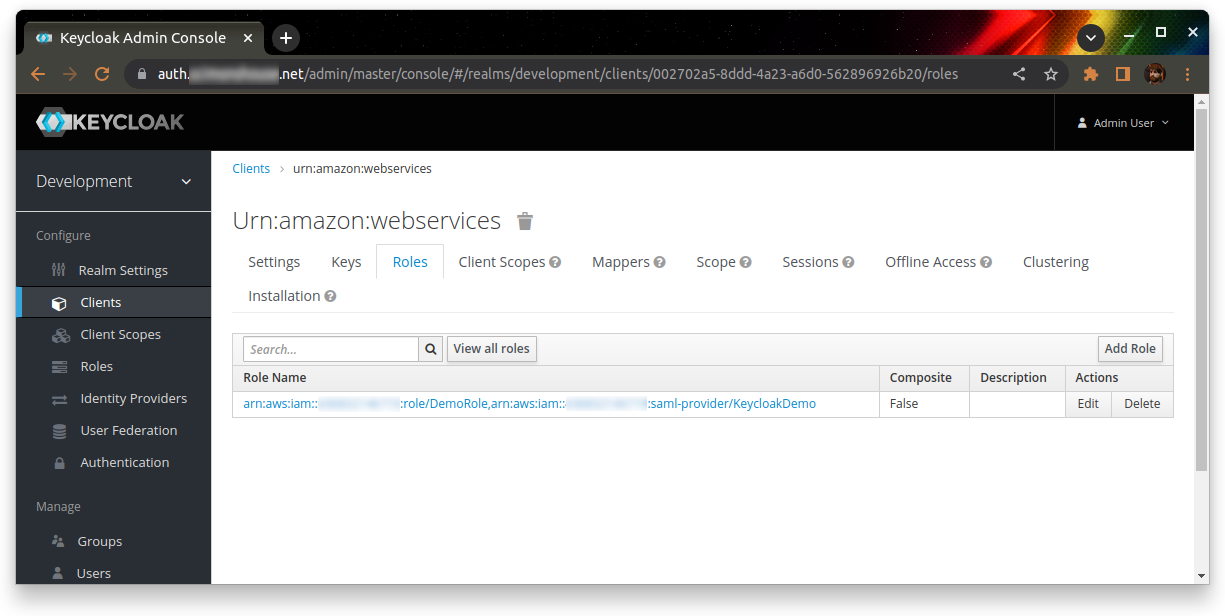
 Go to the “Roles” tab, and add a new role. The role name should be the AWS role ARN, a comma, then the AWS identity provider ARN. For example:
arn:aws:iam::123456789012:role/DemoRole,arn:aws:iam::123456789012:saml-provider/KeycloakDemo
 Assign this role to the users who need it (I recommend the use of groups, but I’m not going to cover that in this walkthrough)
 Finally, you need to replace one mapper and edit another on the client.
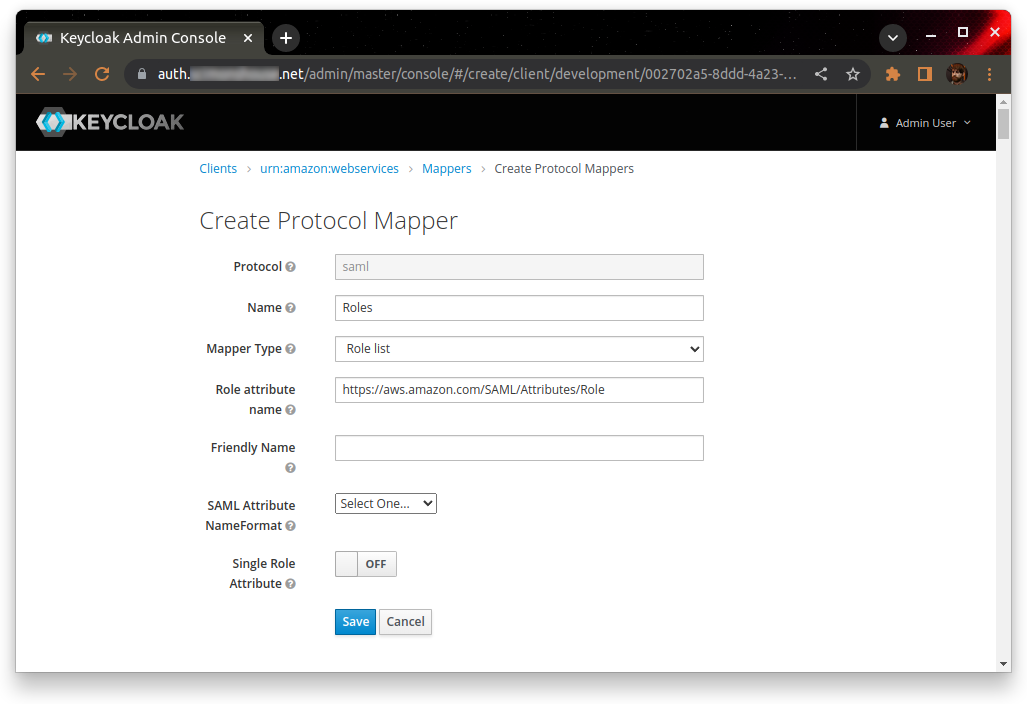
Delete the mapper with the name “https://aws.amazon.com/SAML/Attributes/Role” – this is the one to be replaced. Create a new role (I’ve called it “Roles”) with the mapper type “Role list”, and the attribute name “https://aws.amazon.com/SAML/Attributes/Role”. Turn off “Single role attribute”, and leave everything else as the defaults
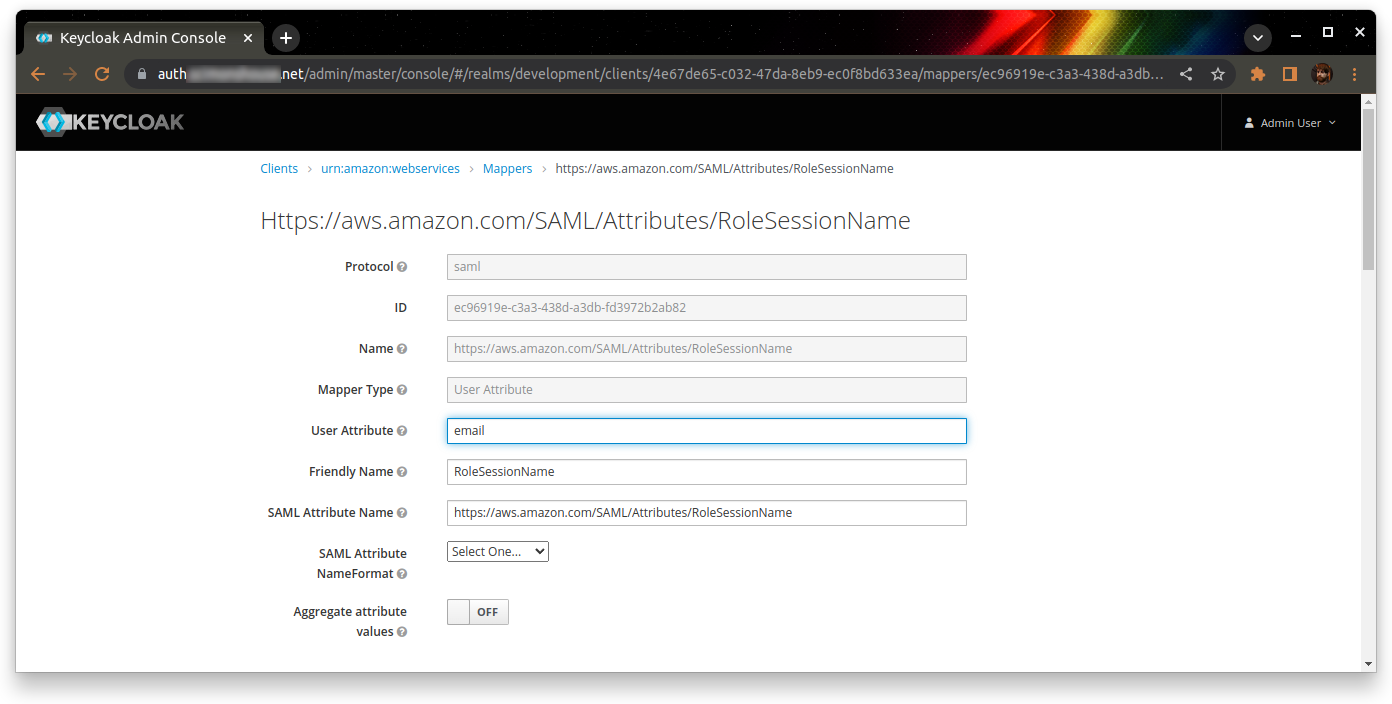
 The role to be edited should be called “https://aws.amazon.com/SAML/Attributes/RoleSessionName”. Give it the user attribute of “email”, and leave the rest as defaults.
 Finally, go to the Client Scopes tab and remove the default “role_list” scope from this client.
 At this point, you should be able to browse to https://<keycloak>/realms/<realm>/protocol/saml/clients/amazon-aws
This should authenticate you to KeyCloak (if you’re not already logged in), and then redirect you to the AWS console where you’ll be already logged in!